2. Draw the design on the plywood with pencil or pen, being aware that the image will be reversed in the print so text etc needs to be written backwards.
3. Assign a colour to each part of the design, marking them with numbers according to which colour they will be.
4. Make a template on a sheet of newsprint by drawing a line around the somerset paper onto the newsprint; then placing the woodblock centrally within the line and drawing around the woodblock.
5. Slide the newsprint template under an acetate sheet on the flat bed of the printing press so it can be used to position the woodblock and the printing paper.
6. Using a woodcut gouge, or a variety of sizes of gouge, cut away the parts of the pattern you wish to remain white.
7. Cover the whole face of the wood block with two even coats of quick-drying varnish.
8. Prepare a work surface by thoroughly cleaning the glass-topped work bench on which you'll roll out your ink.
9. Squeeze out (and if necessary mix the colour of )the relief ink for your first stage print, ensuring you have mixed enough ink for as many prints as you want to make.
10. With a roller, roll the ink out onto the glass, working it until you achieve a uniform satin consistency, neither too wet or too thin.
11. Ink-up the woodblock, being careful to avoid visible tram-lines or joins in the ink made by the edge of the roller; ensure the ink is even over the printing surface by holding it up to the light and watching the play of light over the surface as you tilt the block
12. Using a lint-free rag with a spot of white spirit, clean away any ink that has strayed into the parts of the woodblock you do not intend to print in this colour.
13. Place the inked woodblock onto the flat-bed of the press, registering it exactly within the lines drawn on the template.
14. Take a piece of printing paper, ensuring it is face-side down (with somerset paper you can see the somerset mark on the back edge of the sheet)and holding by two corners, carefully lower it onto the woodblock, ensuring it is positioned exactly to correspond with the outer rectangle line drawn onto your template.
15. Place a sheet of newsprint over the paper and carefully unfold the printing blankets, smoothing them out over the top of your paper.
16. Turn the wheel of the press to move the flat bed under the roller. (With a woodblock, you may need somebody to help push the flat-bed into position until the woodblock engages under the press roller and starts to pull it through the press.
17. Fold back the blankets, remove the newsprint and peel back your first print impression.
18. Put the first print in the drying rack, check it over for any slight adjustments that might be needed to the pressure of the press, or the cut of the woodblock.
19. Repeat steps 10-17 to make as many copies of the print as you want in your edition, adding a few extras to provide some margin for error.
20. Wash off your woodblock with a lint-free rag and white spirit.
21. Clean all remaining ink off the work surface, and ink roller, using vegetable oil and a lint-free cloth.
22. Allow the first stage prints 24 hours to dry before over-printing with the second colour.
23. While the first stage prints are drying, take your gouge(s) and cut away all the parts of the woodblock corresponding to the areas you wish to retain the first colour.
24. After brushing away any wood chips or dust, apply a coat of clear varnish to the new bare wood you have exposed and ensure you do not leave any brush marks or blobs of varnish on the printing surface of the woodblock
25. Repeat stages 9-12 to ink-up the woodblock with the second colour.
26. Place one of your prints face-up on the flat bed of the press.
27. Take a strip of square-edged plywood, and two heavy steel blocks, placing these exactly at the bottom edge of the print and the left and right bottom corners. Allow no more than half a millimetre of leeway and ensure the blocks are exactly square with the edge of the printed area.
28. Take the inked up block and lower carefully into position onto the print, aligning it precisely within the three registration blocks as it is lowered.
29. Press down onto the block to ensure it makes a strong connection with the paper.
30. Remove the registration blocks and place to one side.
31. Slide the woodblock and paper to the edge of the flat-bed and gently but firmly flip it over onto its back onto the flat-bed.
32. Ensuring the block is centred on the bed, repeat steps 14-17 to print the second colour onto your print.
33. Repeat steps 11-12 and 26-32 until you have printed all the sheets with the second colour.
34. Repeat stages 20-24 and 9-12 to prepare the woodblock to print the third colour.
35. Repeat stages 26-32 until you have completed the edition.
36. leave the finished prints in the drying rack for 24 hours
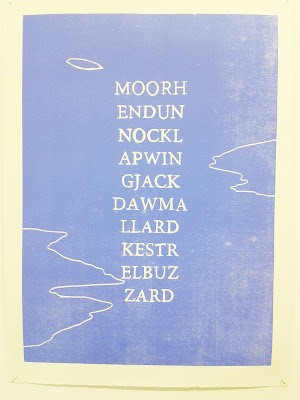
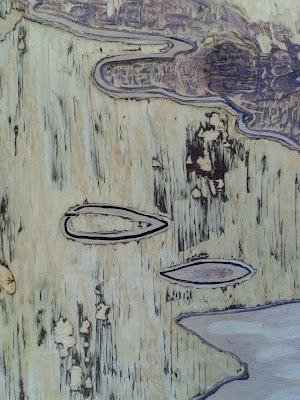
37. Meanwhile, admire the textures and patterns on the woodblock.


No comments:
Post a Comment